Title: ダッシュボードに特別なコンテンツを表示 プラグイン
ダッシュボードの一番上、各セクションより上の部分に、メニューなどの特別なコンテンツを挿入したり、スタイルシートや JavaScript を使って装飾・演出したりできるプラグインです。
インストール
下のリンクをクリックして、このプラグインの zip ファイルをダウンロードします。
サーバー管理者として TeamPage にログインし、サーバーセットアップ > プラグイン ページ下部の [新規プラグインのインストール] で .zip ファイルを選択してアップロードします。
[サーバーセットアップ] > [一般] > [サーバー管理] の [TeamPage の再起動] をクリックして TeamPage を再起動させます。TeamPage クラウド環境では再起動が 2 回必要ですので、1 回目の再起動が完了後にもう一度再起動を行ってください。
再起動が完了したら、サーバーセットアップ > プラグイン のインストール済みプラグイン一覧に [ダッシュボードに特別なコンテンツを表示] と表示されることを確認します。

以上でインストールは完了です。
使い方
設定画面の表示
プラグインの [設定] リンクをクリックします。

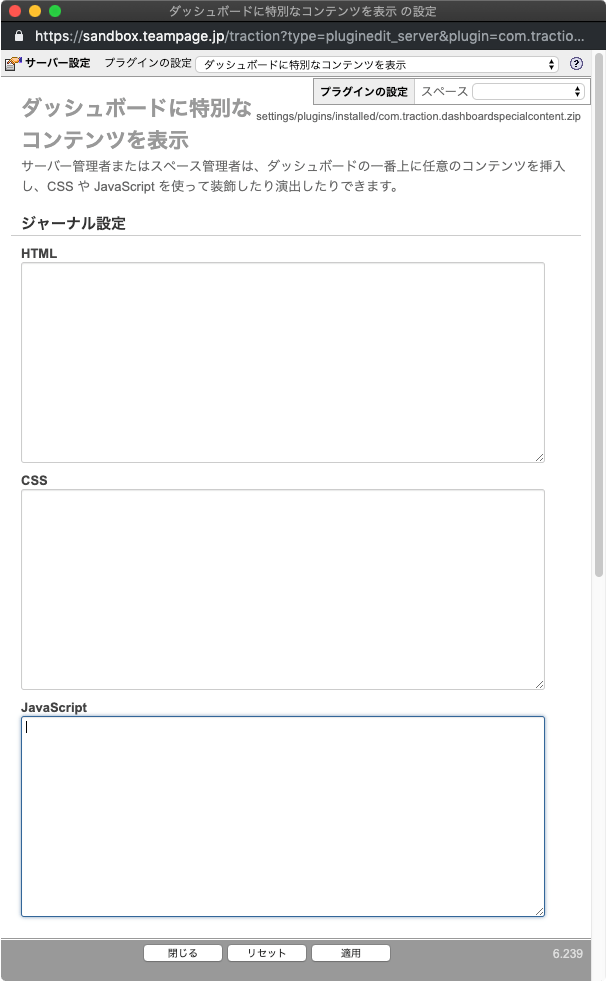
下図のような設定画面が表示されます。

設定例 (1)
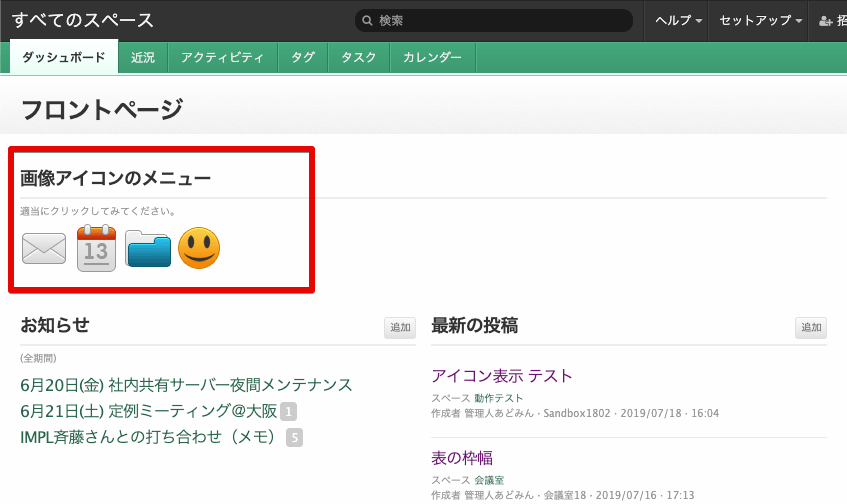
サンプルとして、「すべてのスペース」のダッシュボードの一番上に、下図のような画像のアイコンを 4 つ並べて表示する設定方法を紹介します。

(画像ファイルは、Icojam の「Onebit 1-3 icon set」を使用しました。詳しくは、こちらのページ をご覧ください。)
下記の HTML、CSS、JavaScrtip をコピーし、設定画面の「ジャーナル設定」のそれぞれの欄に貼り付け、[適用] ボタンをクリックしてください。
HTML
<div class="yui-u">
  <div class="sect">
    <div class="sect-hd">
      <h2>画像アイコンのメニュー</h2>
    </div>
    <div class="sect-tip">適当にクリックしてみてください。</div>
    <div class="sect-bd">
      <div class="icons-image">
        <a class="mail" href="javascript:void(0)" title="Mail"></a>
        <a class="calendar" href="javascript:void(0)" title="Calendar"></a>
        <a class="folder" href="javascript:void(0)" title="Folder"></a>
        <a class="smile" href="javascript:void(0)" title="Smile"></a>
      </div>
    </div>
  </div>
</div>
CSS
#dashboard-special-content .icons-image a {
  display: inline-block;
  width: 48px;
  height: 48px;
}

#dashboard-special-content .icons-image a.mail {
  background-image: url('/images/dashboard/icons/mail-icon.png');
}

#dashboard-special-content .icons-image a.calendar {
  background-image: url('/images/dashboard/icons/calendar-icon.png');
}

#dashboard-special-content .icons-image a.folder {
  background-image: url('/images/dashboard/icons/folder-icon.png');
}

#dashboard-special-content .icons-image a.smile {
  background-image: url('/images/dashboard/icons/smiley-icon.png');
}

#dashboard-special-content .icons-image a.smile:hover {
  background-image: url('/images/dashboard/icons/smiley-laugh-icon.png');
}
JavaScript
Proteus.addHandler("load", function() {
  $('#dashboard-special-content .icons-image a').on('click', function() {
    var imgTitle = $(this).attr('title');
    $('#dashboard-special-content .icons-image').after('<div class="you-clicked-msg">あなたは ' + imgTitle + ' のアイコンをクリックしました。</div>');
  });
});
動作確認
(1) 下図のようにアイコンが 4 つ表示され、((2) 一番右の「にこにこアイコン」にマウスカーソルを乗せると口が開き、(3) アイコンをクリックすると、クリックされたアイコンの名称が表示されます。

設定例 (2)
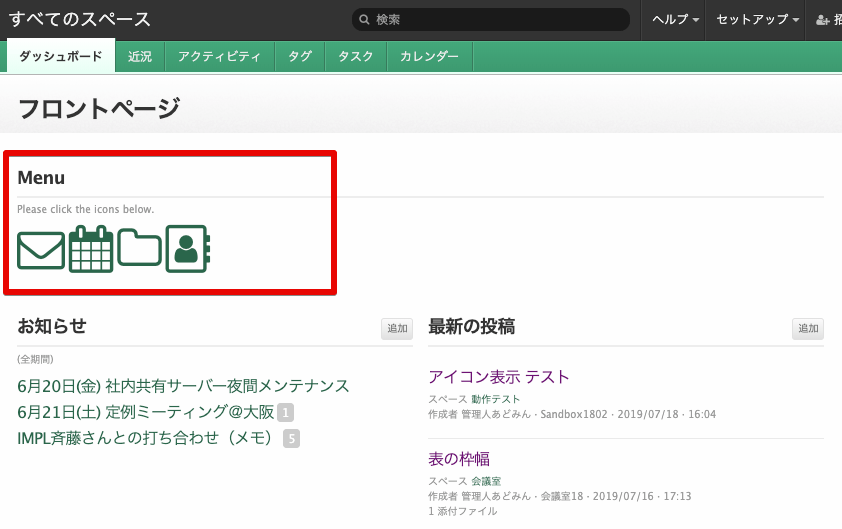
次の例は、画像のアイコンの代わりに Web フォント (Font Awesome) を使ったアイコンを表示します。

下記の HTML、CSS、JavaScrtip をコピーし、設定画面の「ジャーナル設定」のそれぞれの欄に貼り付け、[適用] ボタンをクリックしてください。
HTML
<div class="yui-u">
  <div class="sect">
    <div class="sect-hd">
      <h2>Menu</h2>
    </div>
    <div class="sect-tip">Please click the icons below.</div>
    <div class="sect-bd">
      <div class="icons-fa">
        <a class="mail" href="http://mail.example.jp" title="Mail"><i></i><span>Mail</span></a>
        <a class="calendar" href="http://calendar.example.jp" title="Calendar"><i></i><span>Calendar</span></a>
        <a class="documents" href="http://doc.example.jp" title="Documents"><i></i><span>Documents</span></a>
        <a class="contacts" href="http://contacts.example.jp" title="Contacts"><i></i><span>Contacts</span></a>
      </div>
    </div>
  </div>
</div>
CSS
#dashboard-special-content .icons-fa a {
  display: inline-block;
  text-decoration: none;
  font-size: 400%;
}
#dashboard-special-content .icons-fa a i {
    font-family: FontAwesome;
    font-weight: normal;
    font-style: normal;
    text-decoration: inherit;
    -webkit-font-smoothing: antialiased;
    -moz-osx-font-smoothing: grayscale;
}
#dashboard-special-content .icons-fa a.mail i:before {
  content: "\f003";
}
#dashboard-special-content .icons-fa a.calendar i:before {
  content: "\f073";
}
#dashboard-special-content .icons-fa a.documents i:before {
  content: "\f114";
}
#dashboard-special-content .icons-fa a.contacts i:before {
  content: "\f2ba";
}
#dashboard-special-content .icons-fa a span {
  display: none;
}
JavaScript
なし